Simplify Object Tool
Table of contents:
Introduction
Simplify Object
Advanced Settings
Hello!
Welcome to the article, in which we are going to learn about SelfCAD's 3D modeling tool called Simplify Object. I am going to explain all of its ins and outs and present its general applications. On top of that, I will share a few Tips and Tricks that you could use with Modifications.
Simplify Object is one of the Modify tools available in SelfCAD, and you can find it in the main Toolbar, in the Modify drop-down list. As its name suggests, it allows you to modify selected objects, or selected regions of the object, by reducing the number of faces that create the object or the number of edges that create the profile. If you keep simplifying the object, eventually, you will begin to deform it.
Modify is a unique category because the tools in it do not rely on the topology of the object to apply their modifications. Instead, they cut the object and create new topology when needed.
On top of that, with the Advances Settings of the tool, you will be able to customize the bevel even further.
Follow this article to learn all about this tool!
Select the object
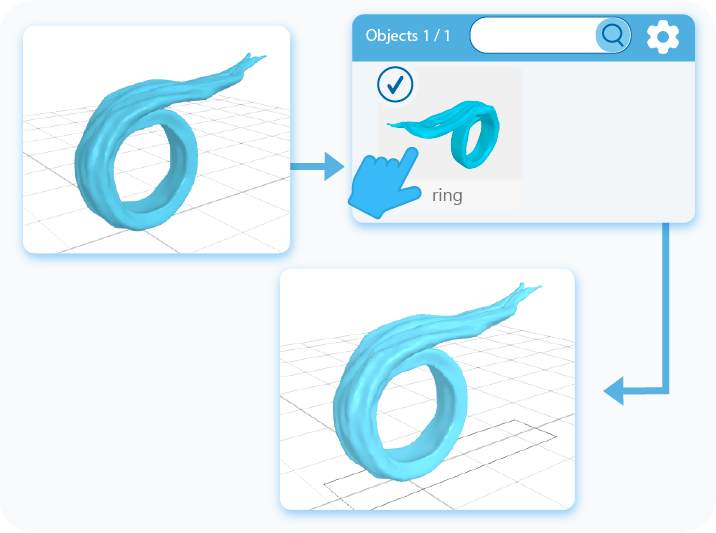
The first step of using any modeling tool is selecting the object on which you want to use it. You can select objects by either left-clicking on them in the workspace or by selecting them in the Object Management section, in the right-side panel. The second option has an in-built search engine, which is extremely useful when you are working with multiple objects.
Activate the tool
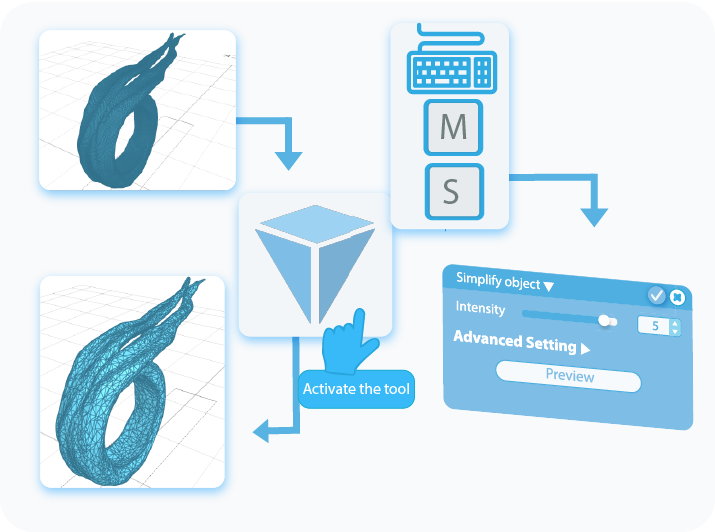
Once the object is selected, you can activate the Simplify Object tool by selecting it from the Modify drop-down list or use a shortcut by pressing the ‘M+S’ combination on your keyboard. This way, you’ll open a Tool Setting Panel with all of the customizable options for this tool on the left side of your screen.
Simplify Object
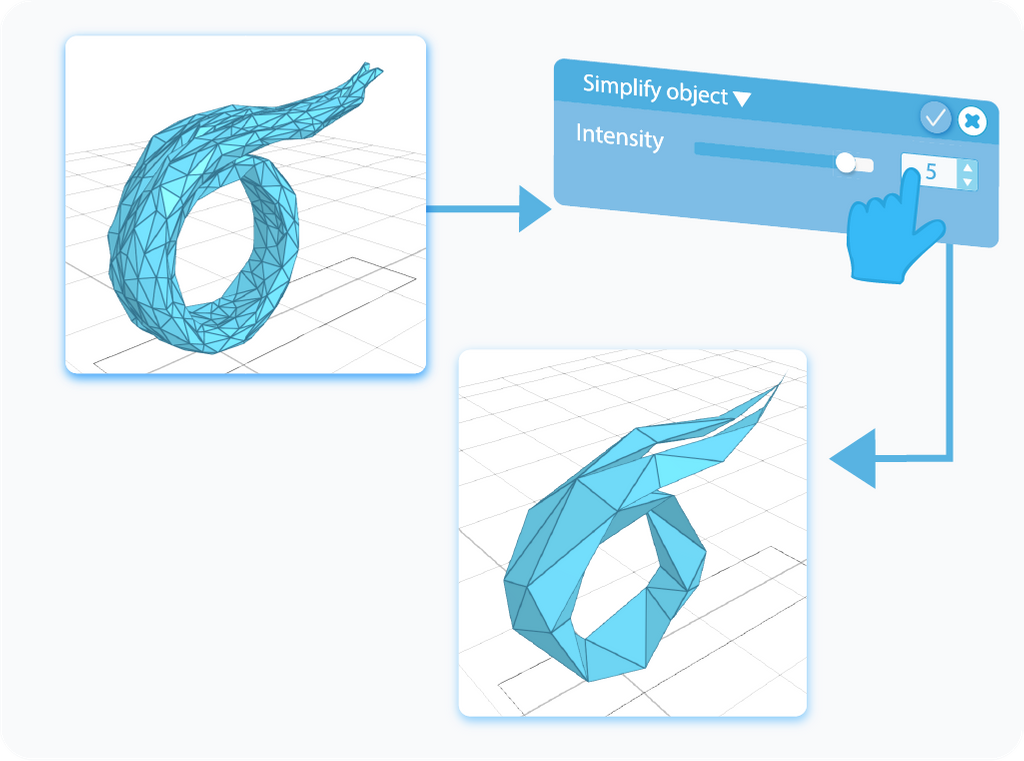
You can Simplify the Object by manipulating the Intensity setting, which, as its name suggests, allows you to set how much you would like to Simplify the model or a profile. As always, you can change this setting by either moving the slider or type the value directly into the text-box in the Tool Settings Panel.
Advanced Settings
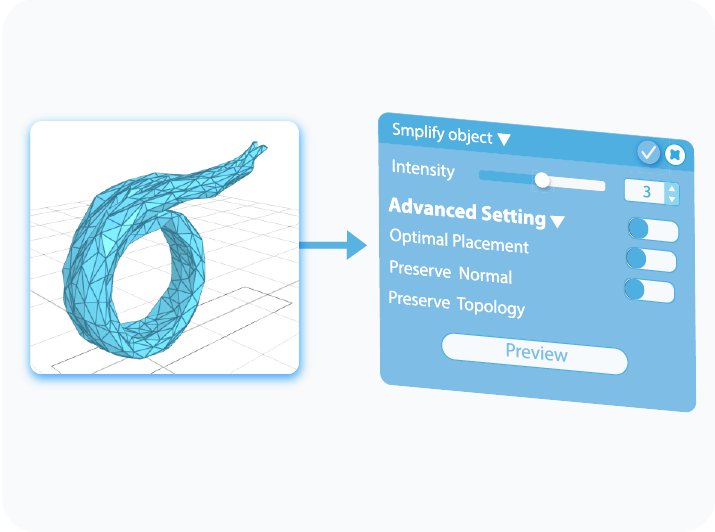
At the very bottom of the Tool Settings Panel, you will find the Advanced Settings of the Simplify tool. You will find there three additional options to customize how the object will collapse.
Optimal Placement
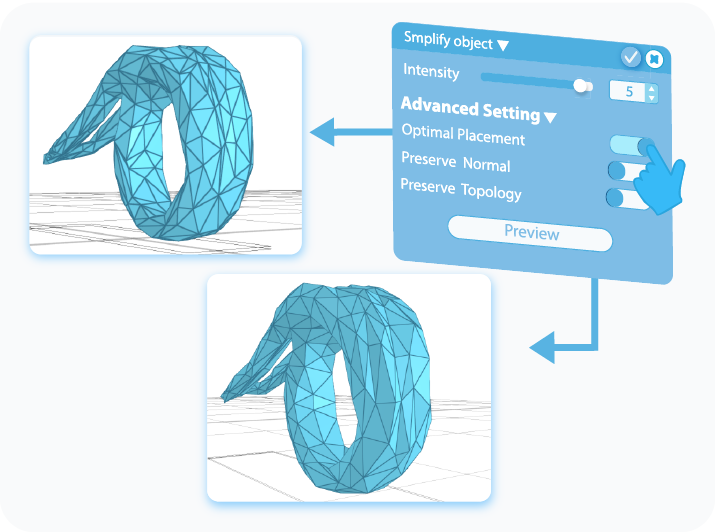
The first of the Advanced Settings of the Simplify tool is Optimal Placement. By enabling this option, you will ensure that the object will be simplified relatively evenly, without leaving spikes in the object's topology.
Preserve Normal
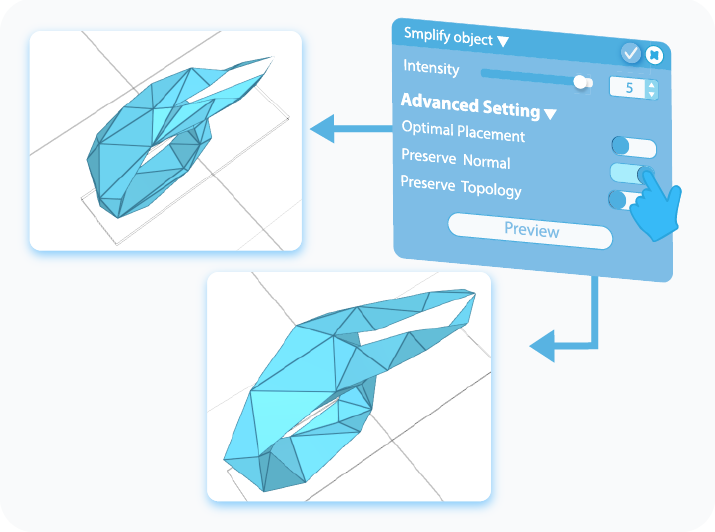
The second option in the Advanced Settings is Preserve Normals. It's a relatively minor setting, which is enabled by default. With this option, the software will avoid flipping the faces of the model during the simplification process.
Preserve Topology
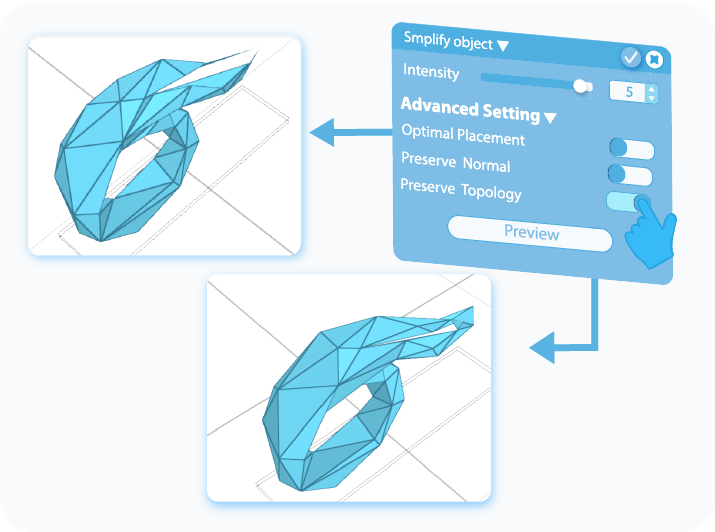
The last of the Advanced Settings is the Preserve Topology. It's a fairly straightforward option as its function is included in its name. By enabling this option, the Simplify tool will avoid collapsing faces in a way that would ruin the topology of the object.
And that’s about it for the Simplify Object. After reading this article, you should know the basics of this tool and how to use it, and know about its different applications. Of course, the graphics shown here were just examples, and using this tool on other shapes will give you slightly different effects, but its underlying principles will always stay the same.
That's all I have for you today. I wish you success in your future projects. See you, and stay tuned for more content to come!
Haven't tried SelfCAD yet? Register now, and try it out for free!
Do you want to learn 3D modeling? Check out our interactive tutorials.


