Inset Tool
Table of contents:
Introduction
Inset
Inset a region
Additional Settings
Advanced Settings
Hello!
Welcome to the article, in which we are going to learn about SelfCAD's 3D modeling tool called Inset. I am going to explain all of its ins and outs and present its general applications. On top of that, I will share a few Tips and Tricks that you could use with Modifications.
Inset is one of the Modify tools available in SelfCAD, and you can find it in the main Toolbar, in the Modify drop-down list. As its name suggests, it allows you to modify selected objects, or selected regions of objects, by creating an inset of their edges with adjustable depth.
Modify is a unique category because the tools in it do not rely on the topology of the object to apply their modifications. Instead, they cut the object and create new topology when needed.
On top of that, the Advanced Settings of the Inset will allow you to set the Macros for this tool.
Follow this article to learn all about this tool!
Select the object
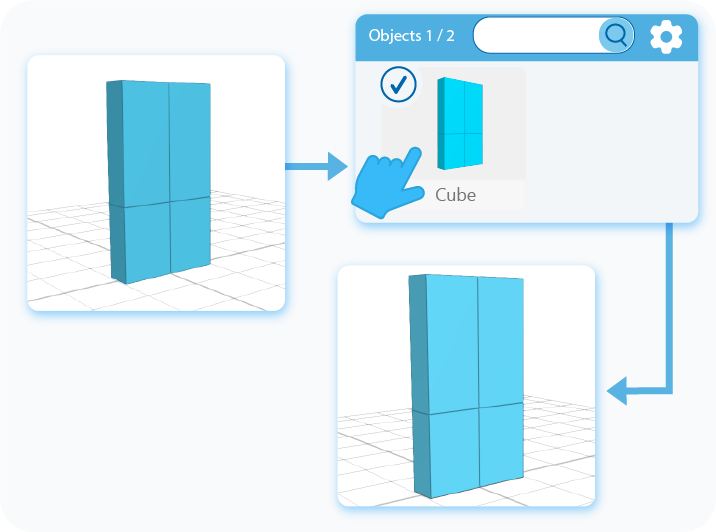
The first step of using any modeling tool is selecting the object on which you want to use it. You can select objects by either left-clicking on them in the workspace or by selecting them in the Object Management section, in the right-side panel. The second option has an in-built search engine, which is extremely useful when you are working with multiple objects.
Activate the tool
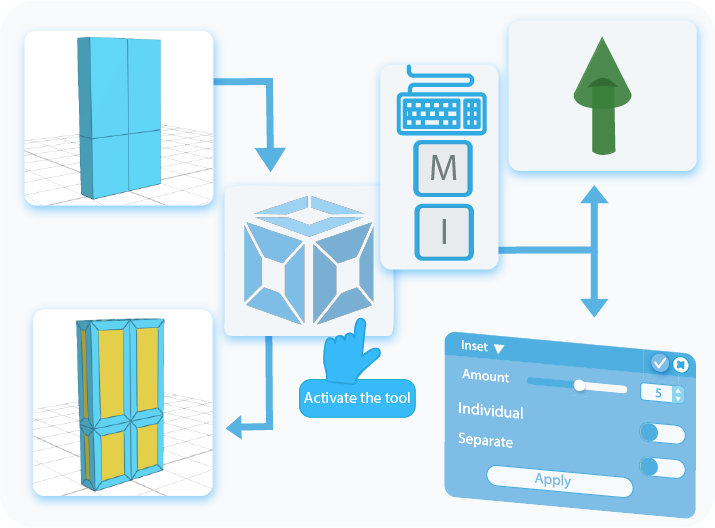
Once the object is selected, you can activate the Inset tool by selecting it from the Modify drop-down list or use a shortcut by pressing the ‘M+I’ combination on your keyboard. This way, you’ll open a Tool Setting Panel with all of the customizable options for this tool on the left side of your screen. Activating the Inset tool will also enable the Gizmo that you can use to Modify the object.
Inset
There are two ways to Inset the object. The first option to do so is by dragging the Gizmo mentioned in the previous paragraph. The second option is to type in the value directly into the text-box or to move the slider next to it to customize it. Inset, in its basic setting, will modify each of the polygons of the figure, but there are other settings that change the behavior of this tool. We will cover those settings to customize the Inset in the following paragraphs.
Select a region
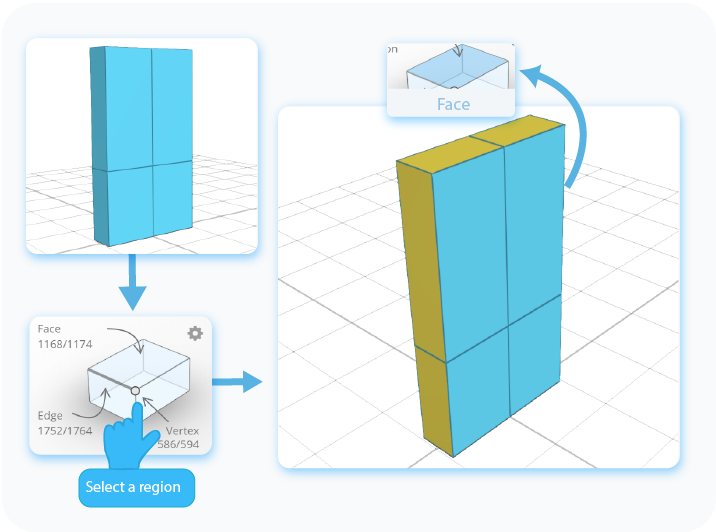
SelfCAD allows you to not only Inset the object itself, but you can also Inset some of its regions. To do so, you need to select them first. In the Right Side Panel, you will find an Interactive Rectangle, where you can enter one of the following selection modes: Face, Vertex, and Edge. Then, you can select the parts of the object that you want to Inset.
Inset a region
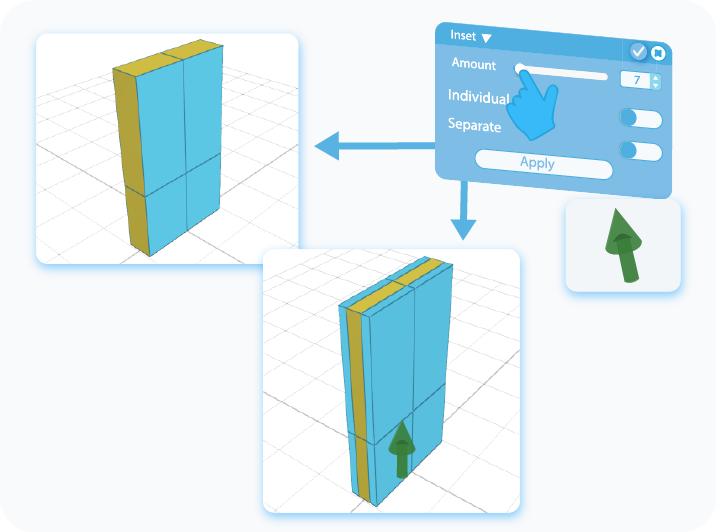
Insetting a region works exactly the same as adding the Inset to the object itself does. After selecting a region or regions that you want to modify, you can either drag them with the help of the Gizmo or type in the values into the text boxes to Inset the selected region with the typed value. Furthermore, adding Inset to regions gives you access to features that were previously disabled.
Individual
Individual is one of the features that change the way the Inset will apply to the selected faces, as this option is available only when you selected at least two regions of the object. As the name suggests, by enabling this option, you will add Inset individually to each of the selected regions.
Separate
Separate is the second feature that changes the way the functionality of the Inset. Similarly to the Individual, this option is available only when you set the Inset for the regions of the object. The difference between them is that Separate allows you to create Insets individually in the faces on different planes.
Advanced Settings
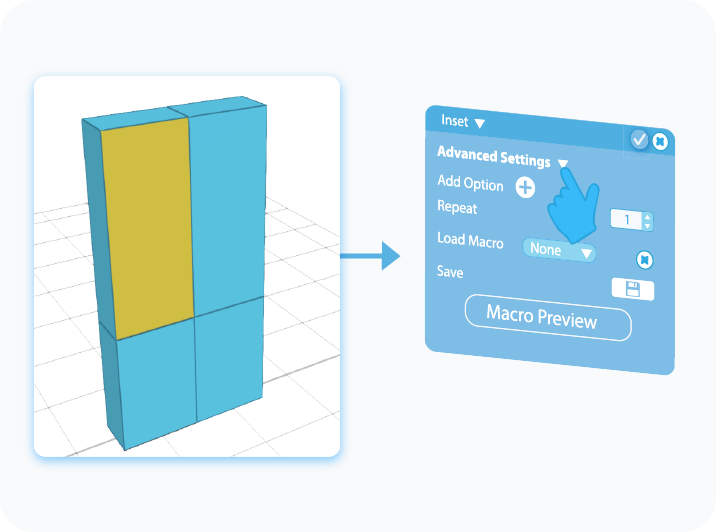
At the very bottom are the Advanced Settings of the Inset tool, which is the part that makes this tool so interesting. Here, you can add additional effects to the Inset, such as setting the number of repetitions that the software will apply to the object and even create templates that you can use in the future. But let's focus on one thing at a time.
Add Option
The first of the advanced settings is called Add Options, which allows you to add additional effects to the Inset. First, click on the + button, which will unfold the customizable options. In the drop-down, you'll find the list of the effects that can be, added to the Inset, and below the drop-down, you'll find the text-boxes where you can customize the added option. You can, of course, add more than one option to the Inset to make it more intricate, by repeating the process.
Repetitions
Repeat is a simple feature that allows you to set the number of repetitions of the Inset that the software will perform on the object. Each repetition will use the same settings, and they will be executed, on top, of each other.
Save Macro

At the very bottom of the Advanced Settings is the feature called Load Macro, which allows you to save the customized settings above in the form of a template that you'll be able to reload and use during future Insets. You can choose stored macros from the drop-down list at the bottom of the panel.
And that’s about it for the Inset. After reading this article, you should know the basics of the Inset tool and how to use it, know about its different applications, and what is more important, know how to implement and customize its advanced settings. Of course, the graphics shown here were just examples, and using this tool on other shapes will give you slightly different effects, but its underlying principles will always stay the same.
That's all I have for you today. I wish you success in your future projects. See you, and stay tuned for more content to come!
Haven't tried SelfCAD yet? Register now, and try it out for free!

Do you want to learn 3D modeling? Check out our interactive tutorials.


