3D Sketch
Table of contents:
Introduction
3D Sketch
Modes
Plane Settings
Profile Settings
Precision Settings
Hello!
Welcome to the article, in which we are going to learn about SelfCAD's Drawing tool called 3D Sketch. I am going to explain all of its ins and outs and present its general applications.
3D Sketch is the second of the Drawing tools available in SelfCAD that you can find in the main Toolbar. Just like its name suggests, it allows you to draw Profiles of any shape that you want that you can later convert into fully-fledged 3D models.
Drawing is unique because not only it allows you to draw profiles, it allows you to customize a variety of factors that impact the Drawing. In Freehand, you can access different modes of operation and customize Planes, and a variety of other settings that you will not find anywhere else.
Follow the article to learn all about this tool!
Activate the tool
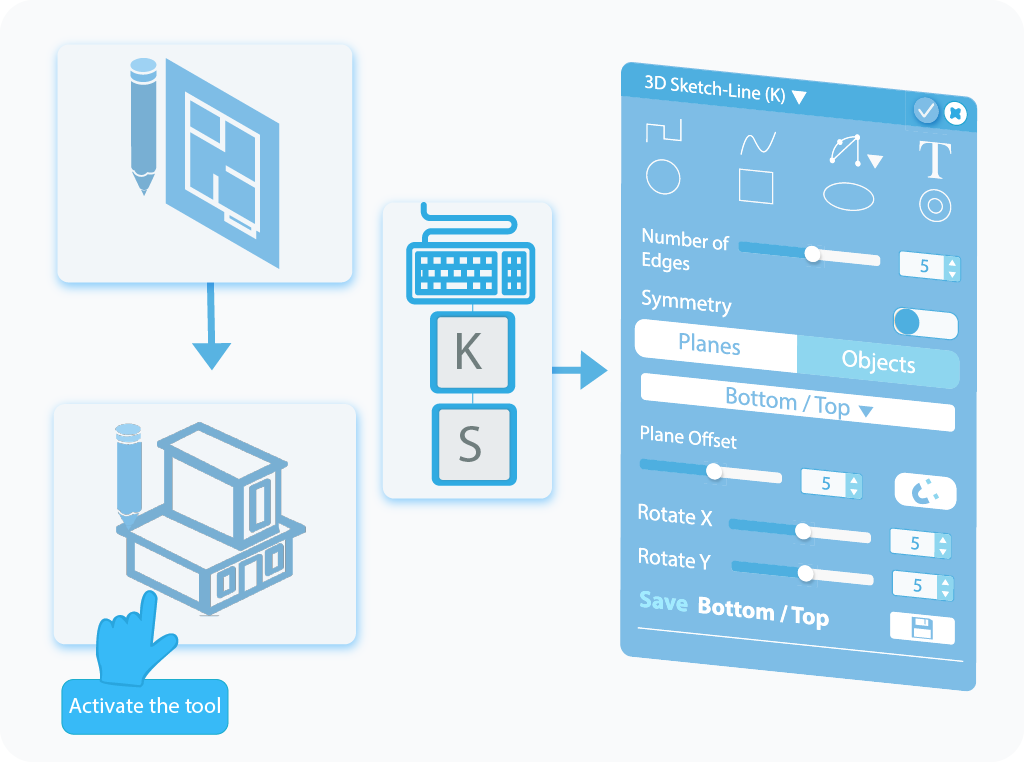
To activate the 3D Sketch tool, all you need to do is to select it from the Drawing drop-down list in the Main Toolbar or use a shortcut by pressing the letter ‘K' on your keyboard. This way, you will open a Tool Setting panel with all of the available, customizable options for this tool on the left side of your screen. Contrary to Freehand, where there were two options for creating Drawings, 3D Sketch provides a single one. It is, naturally, by Drawing profiles with the help of all available features. You will find the customization process explained down below.
Choose and Customize the Shape
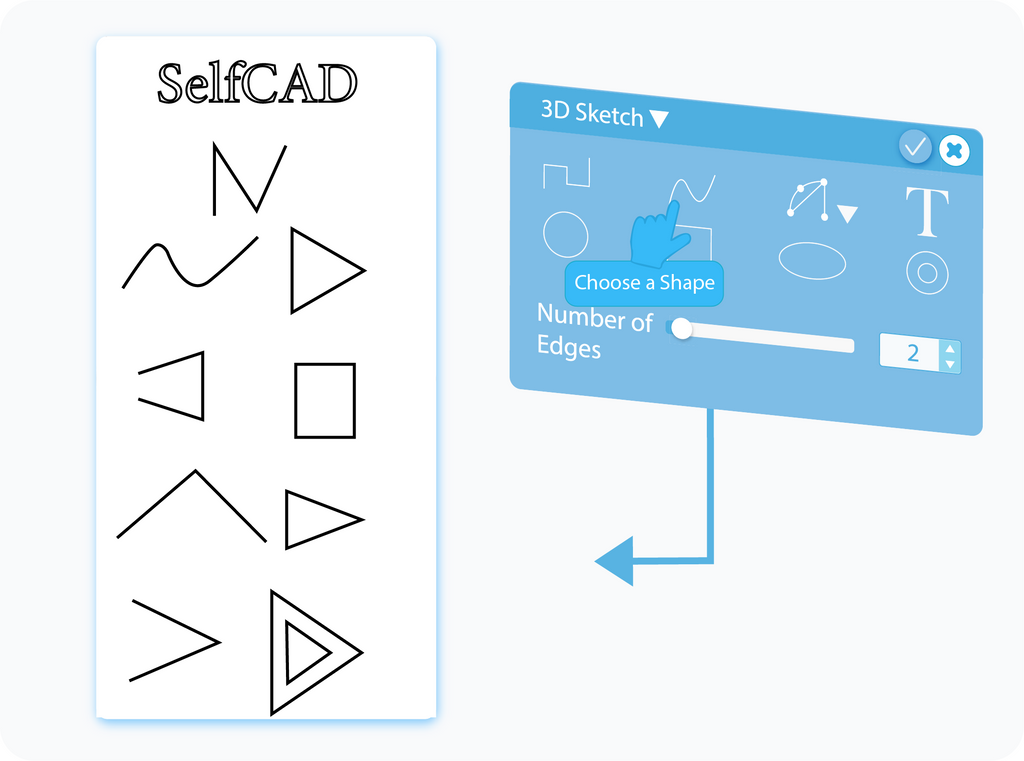
The first options in the 3D Sketch tool are dedicated to selecting and customizing the shape the Brush used to draw a profile. SelfCAD offers a variety of options to choose from, which range from simple geometrical shapes to the option to draw text. Additionally, each shape offers unique, customizable options. For example, you can set the smoothness of the Circle and the font of the Text. Other shapes offer different options.
Symmetry
One common feature available for all shapes is called Symmetry. As you can guess, enabling it allows you to create a symmetrical copy of the drawn object on the selected axis. After enabling this setting, you will see options where you can select on which axis to create the copy.
Planes
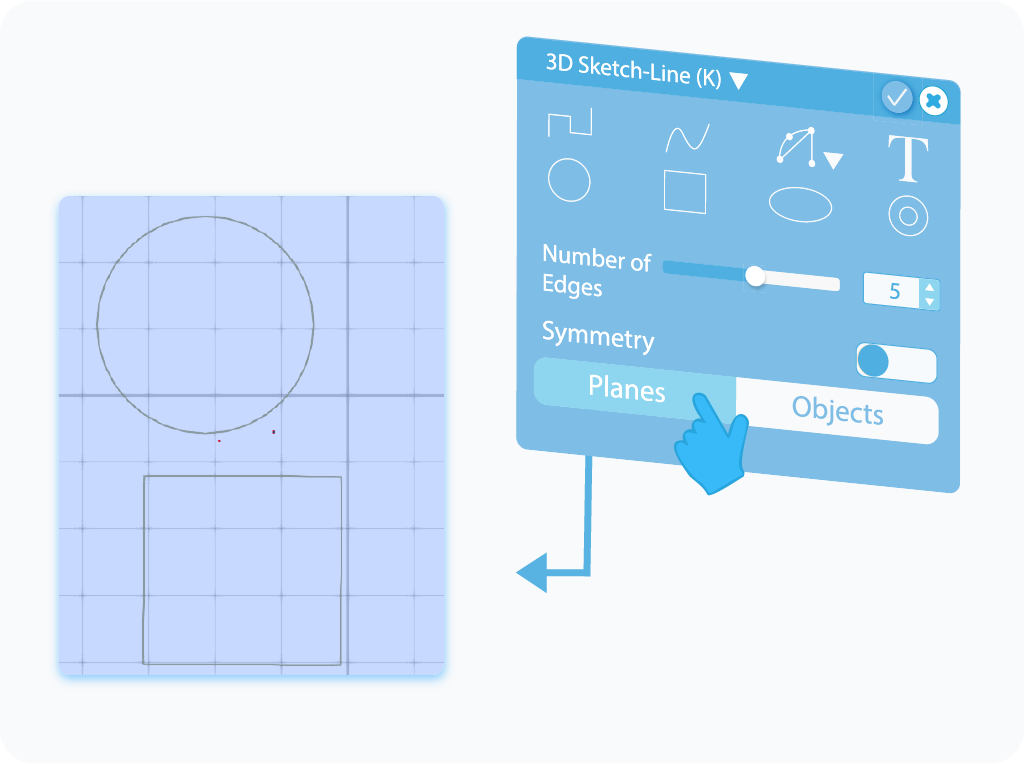
There are two Modes available for the 3D Sketch tool. The first of them is called Planes, which, as you can guess, allows you to draw any shape on the selected Plane or Planes.
Objects
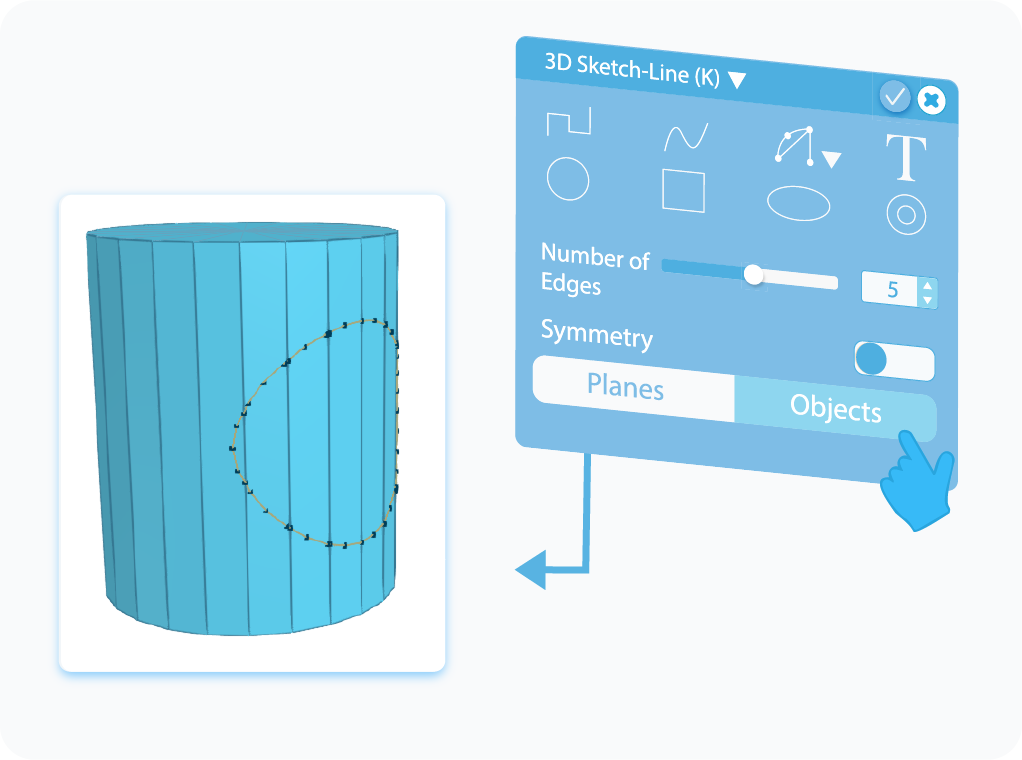
The second Mode is called Objects, which, as its name suggests, allows you to Draw on the pre-existing objects in the Grid (Workspace). Enabling this Mode will disable the Planes, so your Sketch will not accidentally snap to it.
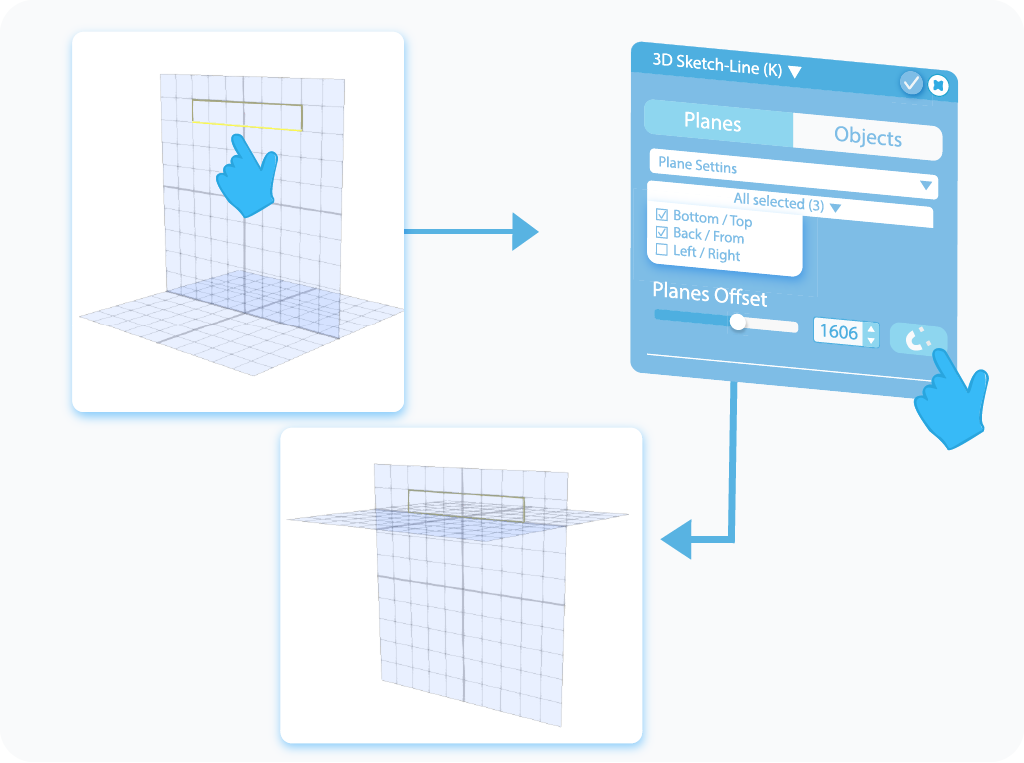
Plane Settings
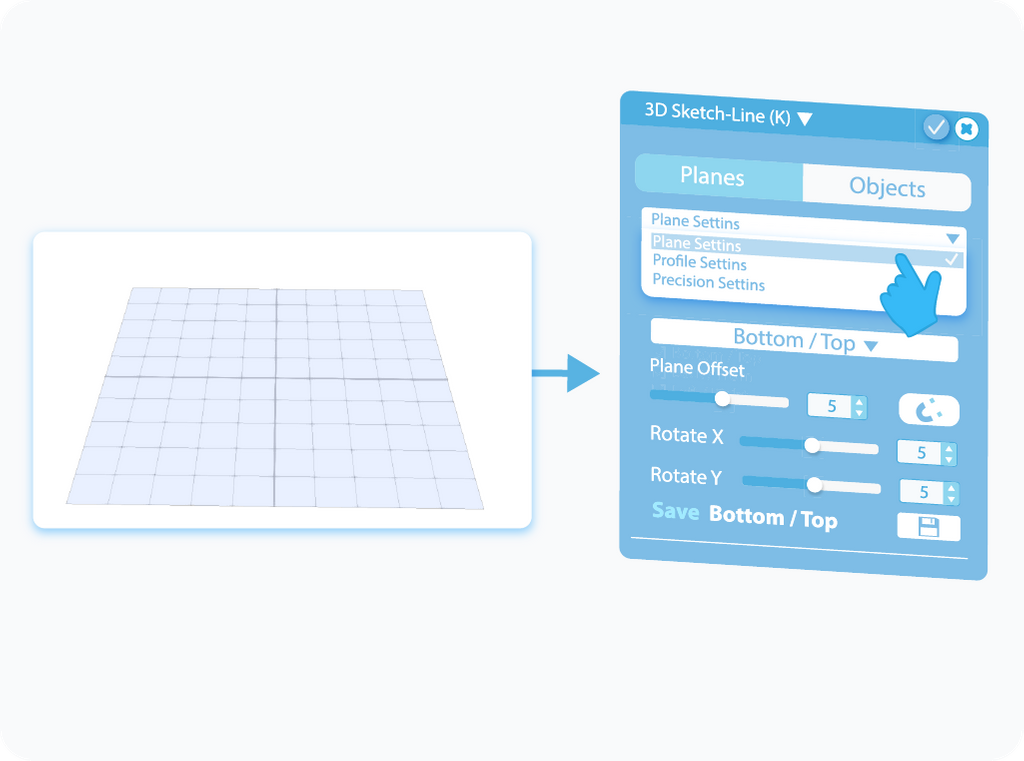
Plane Settings are naturally available only for the Planes Mode. Here, you can manipulate the planes on which you are going to Sketch. There are three planes, each reflecting each of the axes. You can select them from the drop-down list placed at the bottom of the panel. Enabling each of them will allow you to customize them further.
Planes
The first option in the Plane Settings is a simple drop-down, which allows you to enable a particular plane you would like to Sketch on. There are three planes, each representing one of the dimensions. Each of the selected planes has its own set of customizable options available below.
Offset
Following the selection of the planes is the Offset setting. As stated above, each selected plane has its own set of customizable options, which includes the Offset as well. By moving a slider, you will move the respective plane across its dimension, which allows you to set the position of the drawing in the workspace.
Snap Plane
Snap Plane allows you to move the plane to a selected point in the scene. It's particularly useful when you want to sketch precisely on the surface of the shape, as it allows you to level the plane directly to any vertex or edge of the object.
Rotation

Below are the settings responsible for the rotation of the planes. Just like with the offset, each selected plane has its own set of customizable options. By moving one of the two sliders, you'll be able to set the rotation of the plane in two dimensions.
Profile Settings
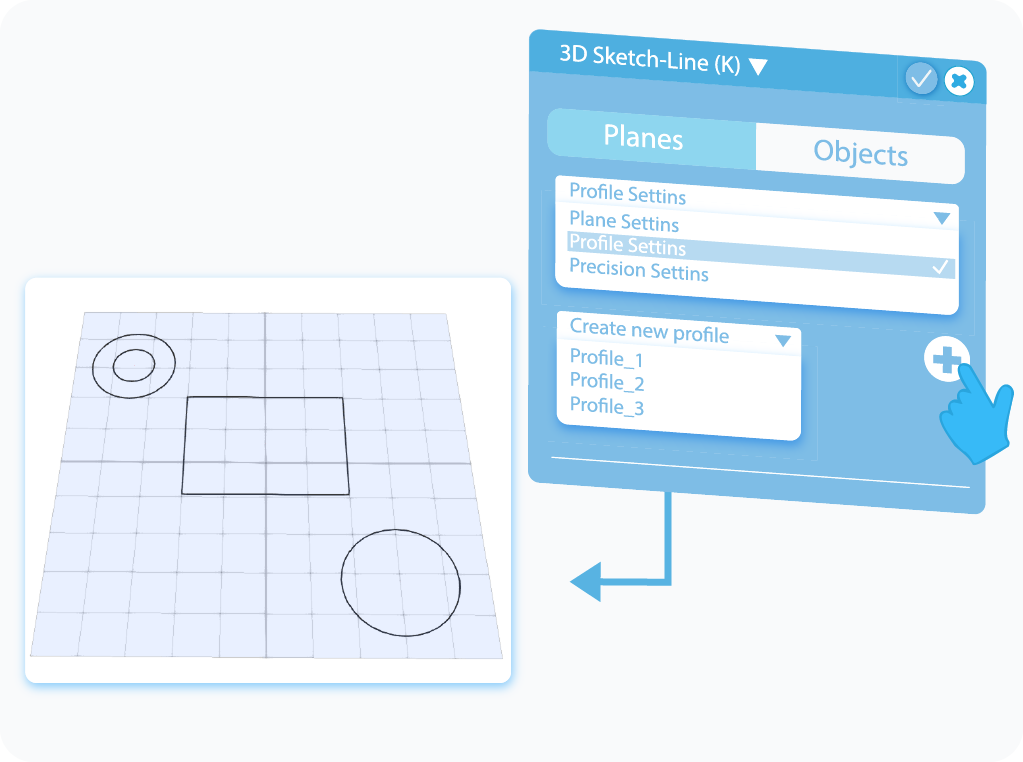
Then there are Profile Settings, which are available for both Planes and Objects Modes of the Sketch tool. Here, you will find storage of sorts for the previously created Sketches, where you can select them to work on them further. Additionally, you can use the '+' button to save the progress of the drawn profile and start working on the new one, without the need to close the tool.
Precision Settings
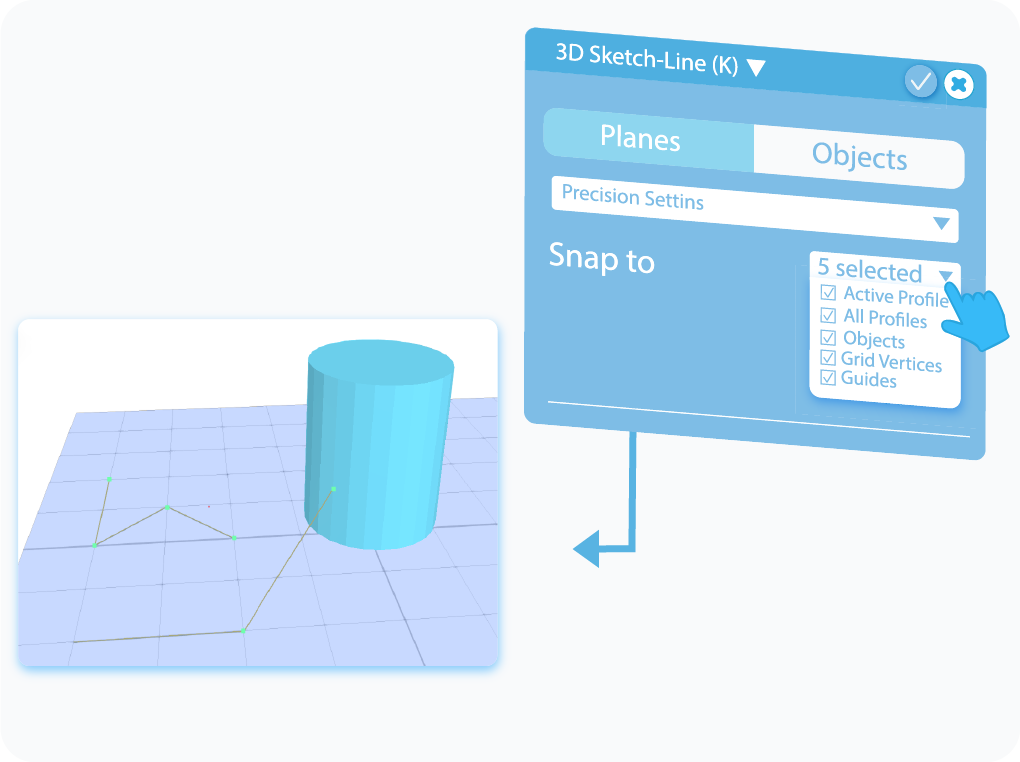
The last are the Precision Settings, which are available for both Planes and Objects Modes of the 3D Sketch tool, which are responsible for the attention to the detail of the Sketch. Here you will find options responsible for precise measurements of the drawing, the angles between lines, as well as their snapping points.
Snap To
The first feature in the Precision Settings is called Snap To. After extending the drop-down list, you will find the elements of the grid to which you can connect your Sketch. They are available for both the Planes and Objects Modes, and you can choose to Snap the Sketch to other Active Profiles and All Profiles in the workspace, other Shapes, Vertices, and Guides that you can create with the help of the tool under the same name in the Tools category.
Minimum Step Size
Minimum Step Size is one of the most useful features when it comes to precise Drawing, where you have to operate on strict values. It locks the 3D Sketch tool at a specified value, which will allow you to draw profiles based on that value. For example, if you set Minimum Step Size to 50, then you will be able to Draw a line of the length of 50, which will serve as a first step. When you try to draw a longer line, its length will increase by another 50 and so on.
Minimum Angle Step
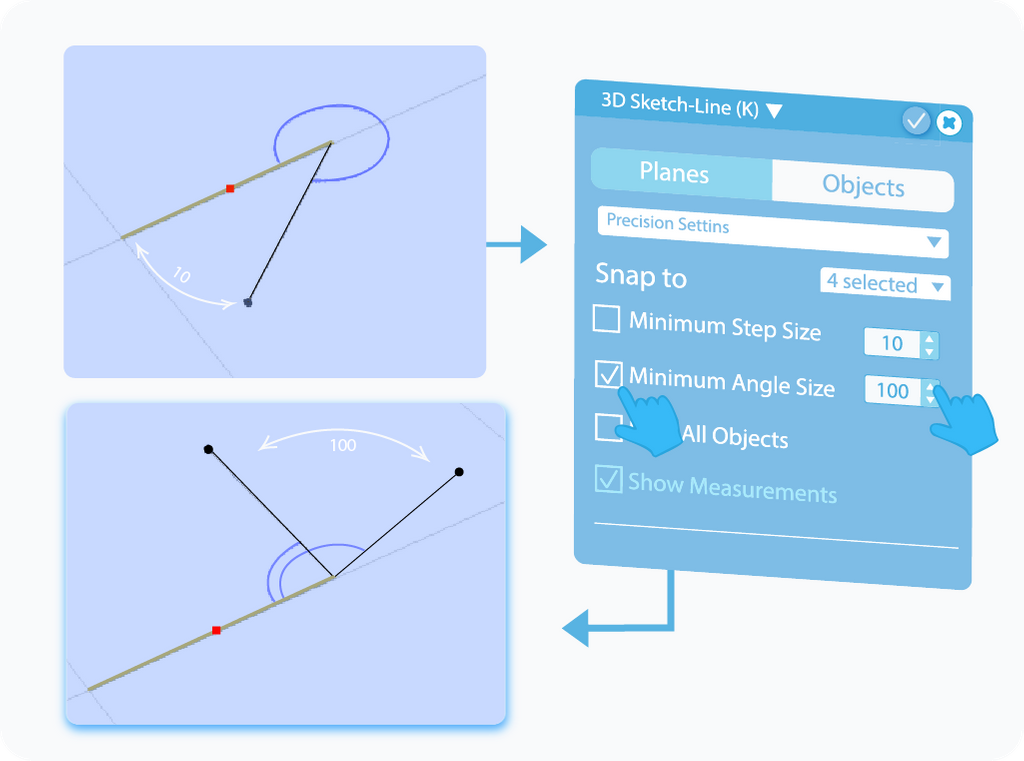
Minimum Angle Step is a similar option to the previous one. It locks the 3D Sketch tool at a specified value (angle), which can be useful when you need to Draw an object with minute attention to detail. For example, if you set the Minimum Angle Step to 15, then you will be able to set an angle between steps to 15, which will serve as the first step. When you try to increase that angle, it will do so by another 15 and so on.
Override Step Size
Override Step Size is a feature that appears after enabling either Minimum Step Size or Minimum Angle Step or both. By enabling this option, you will be able to ignore those preset values when the software finds a point that it can Snap To.
Hide all Objects
Hide all Objects is an additional option available in Precision Settings of the 3D Sketch Tool. As its name suggests, it hides every other object previously added to the grid. It allows you to draw and customize the current model without other objects getting in the way and overshadowing it.
Show Measurements
Show Measurements is rather self-explanatory. Selecting this option will enable a text-box with the measurements of the length and the angle of each step of the drawing. However, there is more to it than just passively observing their numbers. You can use this feature to draw precise steps by typing in the exact values of each step into the text-boxes.
And that’s about it for the 3D Sketch. After reading this article, you should know the basics of this tool and how to use it, and know about its different applications. Of course, the graphics shown here were just examples, and drawing with even slightly different settings will give you different results, but their underlying principles will stay the same.
That's all I have for you today. I wish you success in your future projects. See you, and stay tuned for more content to come!
Haven't tried SelfCAD yet? Register now, and try it out for free!

Do you want to learn 3D modeling? Check out our interactive tutorials.


