
How to Design a Living Room Chair Using SelfCAD AI Features
To create a 3D model, first learn shapes, dimensions, transformations, and other modeling techniques. Even a simple piece of furniture, like a chair for a living room, may need multiple manual processes before the final design takes shape, especially for novices. An alternative method is SelfCAD AI Modeling, which employs AI to produce the fundamental geometry of a chair while allowing users to describe it in common language.
In this article, we will use a text prompt to create a customized living room chair. The project will walk through every step of the procedure, from using the AI Modeling tool and making a thorough prompt to producing, altering, and getting the model ready for 3D printing. SelfCAD's AI features enable users to improve the created design using traditional 3D modeling tools, making the initial modeling process more accessible while retaining control over the final shape, proportions, dimensions, comfort, and general functioning.
Steps of Design a Living Room Chair Using SelfCAD AI Modeling
Step 1: Open the SelfCAD Editor.
To begin, open the SelfCAD Editor and start a new project.
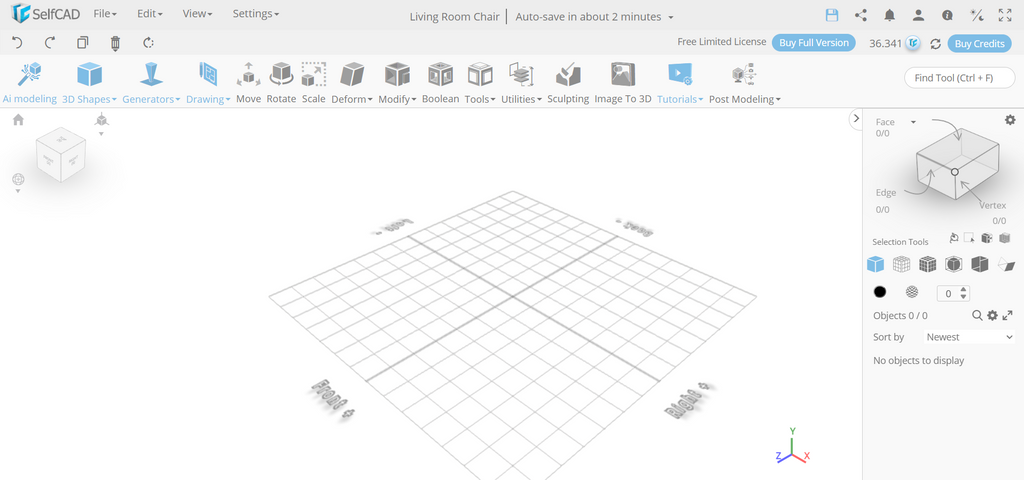
Before making any additional adjustments to this project, we will use AI Modeling to construct the basic geometry of the living room chair.
Step 2: Open AI Modeling
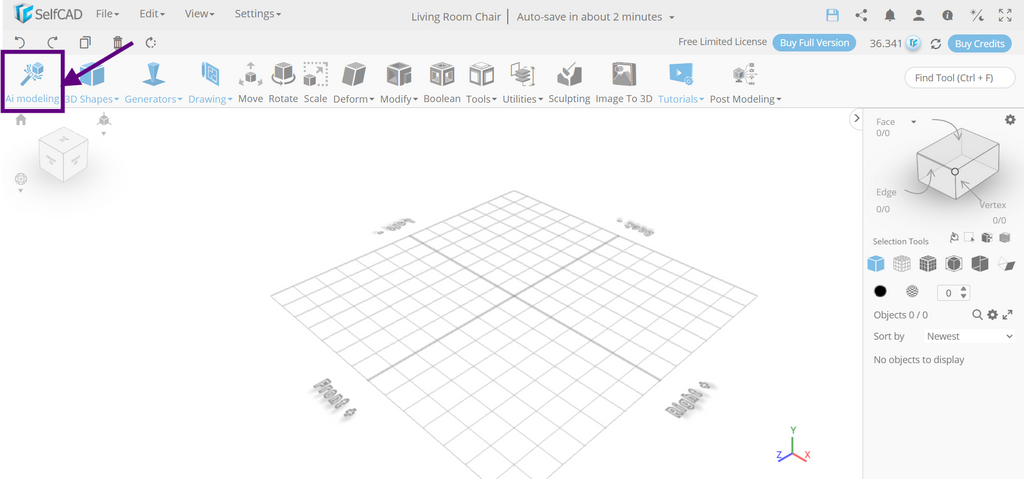
To use the AI-powered modeling tool, select AI Modeling in the SelfCAD Editor. You can express your design needs in detail using the text prompt provided by the AI Modeling interface. SelfCAD offers a variety of AI generating methods according to the kind of product you wish to produce.
Instead of creating an unduly complicated or ornamental form, our objective is to create a living room chair that is both pleasant and practical, with a clear and robust structure. Sturdy legs or supporting structure, a comfortable backrest, a supportive seat, and a secure base should all be features of the design. Additionally, the model should be ready for additional development and 3D printing preparation.
Step 3: Select the Correct Creation Mode
Select a Functional Assembly for the design of the living room chair.

A living room chair is made up of several components that function as a single unit. Among the essential components of the design are the primary seat, backrest, legs or supporting frame, armrests, and connecting or reinforcing parts.
Each component has a distinct purpose, making the Functional Assembly technique effective for chair construction. The seat provides the primary sitting area, the backrest offers support, and the legs or frame provide stability. While connecting and reinforcing components aid in preserving the chair's strength and structural integrity, armrests can enhance comfort. This method makes the design process more structured and effective by taking into account how each component affects the chair's overall stability, comfort, functionality, and look.
Step 4: Add a Reference Image
Adding a reference image is optional, but it can be useful when creating a living room chair with SelfCAD AI Modeling.
You can upload an image of a chair to provide the AI assistant with further visual input on the ideal design, style, proportions, construction, or overall look. However, the written prompt is still the most significant aspect of the procedure. The AI helper should be able to understand the design requirements based on your description, even without an illustration.
To achieve better results, provide crucial characteristics such as the chair's overall size, seat shape, backrest, legs or supporting frame, armrests, proportions, orientation, edge treatment, and structural stability. A comprehensive request allows the AI to construct a chair that is more closely related to your desired design.
Step 5: Write a Prompt for AI Modeling
Now describe the living room chair you wish to construct with SelfCAD. A detailed prompt is extremely beneficial since it provides the AI with specific information about the chair's purpose, dimensions, seat and backrest design, supporting structure, legs or frame, armrests, proportions, stability, comfort, and general orientation. The more specific your description is, the more accurately the created model will mirror your intended design.

For example, you may use the following prompt:
Create a modern living room accent chair as a detailed 3D furniture model. Design a comfortable upholstered chair with a wide cushioned seat, a slightly curved backrest, and gently rounded armrests. Give the chair an ergonomic shape suitable for relaxing and everyday living-room use.
Create a sturdy four-leg wooden frame with slightly angled legs for stability. Add thick, soft cushions to the seat and backrest with realistic rounded edges and subtle stitching details. Make the upholstery smooth and slightly textured, using a warm beige fabric color with a premium, contemporary appearance.
Use clean geometry, realistic proportions, smooth surfaces, precise bevels, and manufacturing-friendly construction details. Ensure the seat, backrest, armrests, cushions, and legs are properly aligned and connected.
The final model should look like a professionally manufactured modern living room chair, with realistic materials, polished 3D geometry, comfortable proportions, and a clean product-design aesthetic suitable for rendering from multiple angles.

This precise description helps the AI better comprehend the desired living room chair and serves as a solid foundation for creating the initial 3D model.
Step 6: Generate the Model
After entering the prompt and attaching the reference image (not required), click Generate:

Here, you can see SelfCAD AI analyzing the request for generating the key elements required to make the living room chair.

This shows the difference between traditional manual modeling and AI-assisted modeling. Rather than designing and changing fundamental shapes from scratch, SelfCAD AI develops the initial chair geometry based on your design specifications.
The AI assistant will design the living room chair, including the seat, backrest, legs or supporting frame, armrests, and any other design aspects provided in the prompt. You may then check the created model in the SelfCAD Editor, make changes, and modify it to your specifications. This allows you to keep your original design concept while enhancing the chair's dimensions, proportions, stability, comfort, and overall attractiveness.
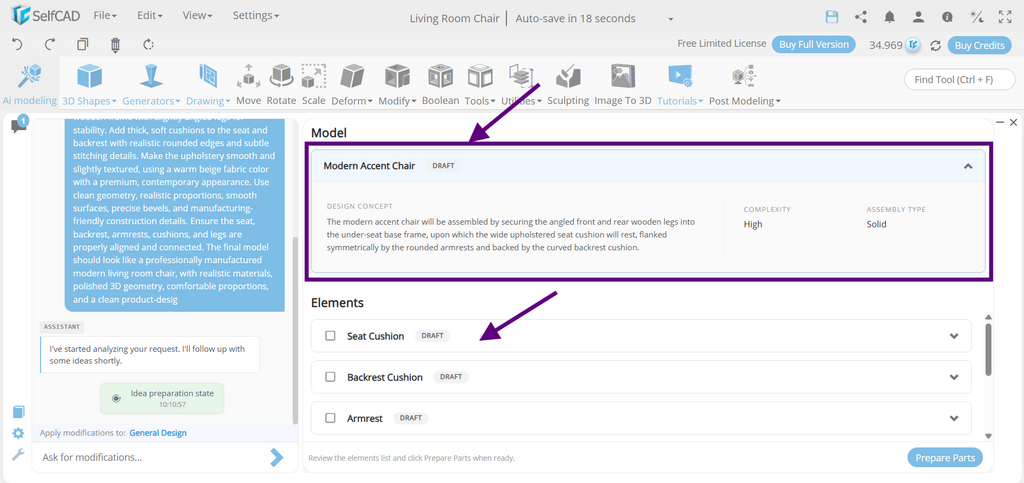
Step 7: Prepare the Parts
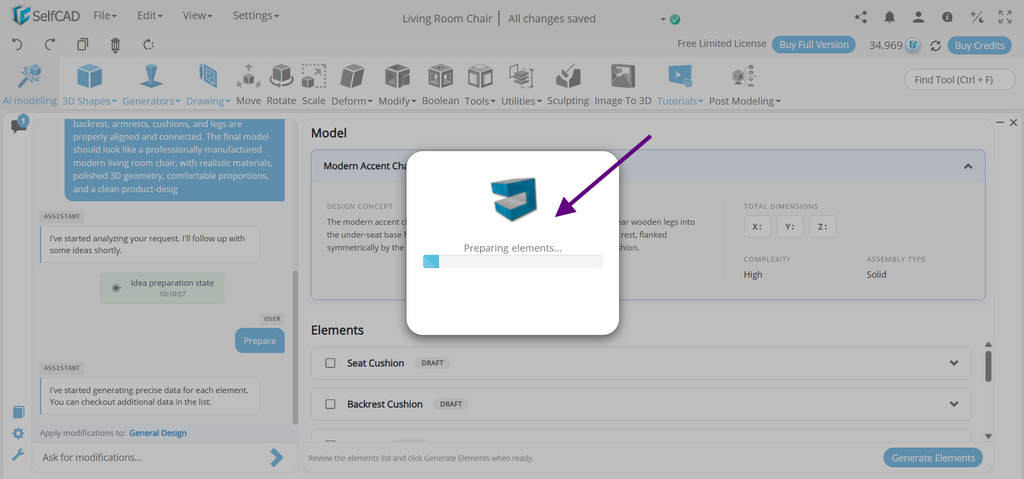
When you are satisfied with the draft, click Prepare Parts.
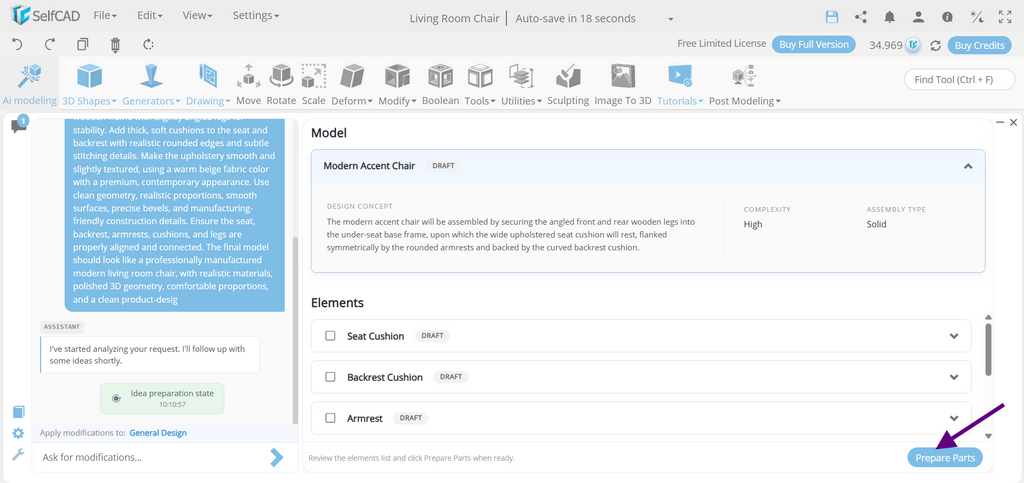
As you can see, the tool is preparing elements.
Ask for Modification:
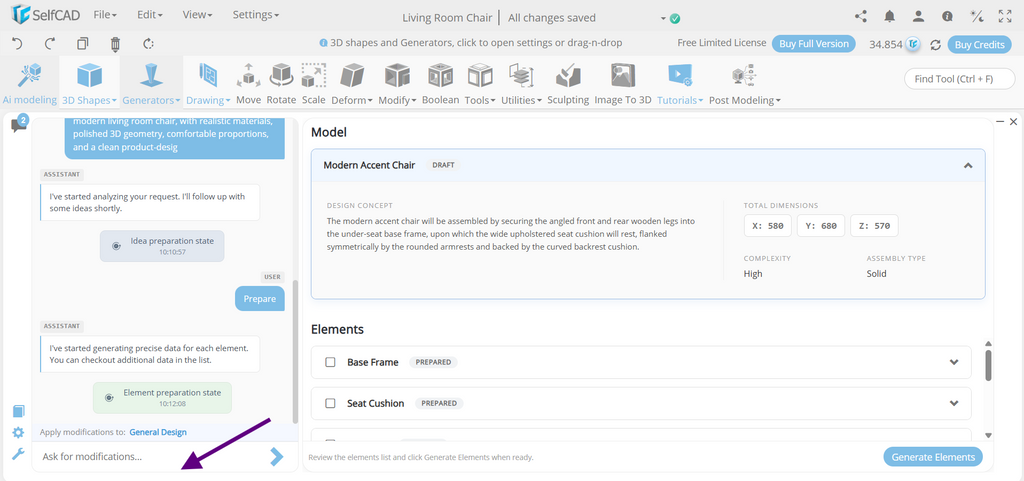
Once the first model is complete, you may use AI to improve the living room chair. When you wish to change the size, shape, position, orientation, strength, or other properties of an element, simply supply specific instructions.
As indicated in the screen shot above, the AI will make the modifications you want depending on your instructions. This allows you to easily adjust the seat, backrest, legs or supporting frame, armrests, and other components until the chair meets your specifications. You can continue to modify the design to improve its dimensions, stability, comfort, and overall attractiveness.
Step 8: Generate Elements
Next, Click on Generate Elements:
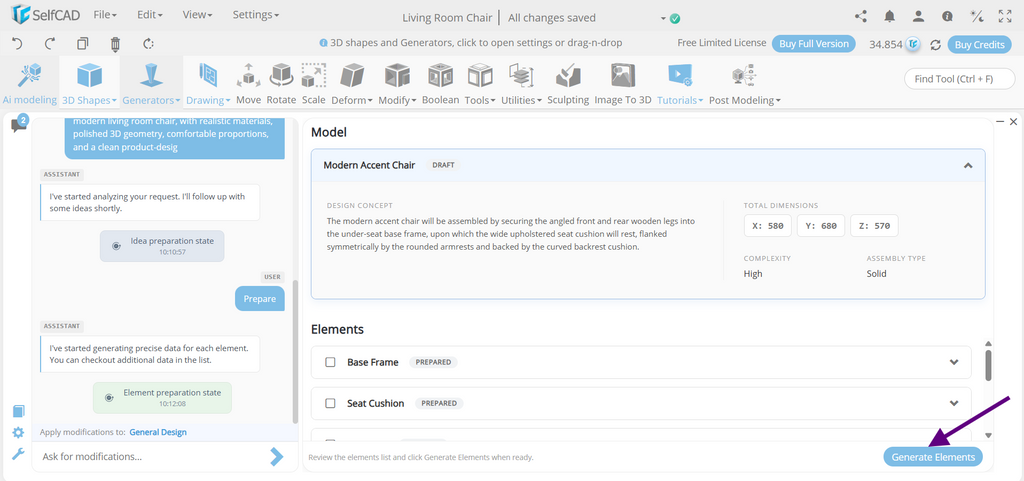
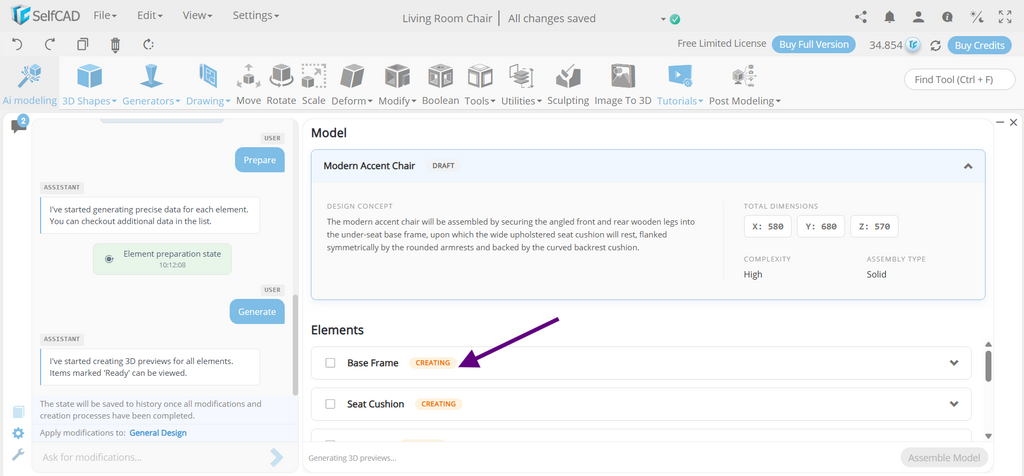
The tool will show that it is creating the following elements:
Step 9: Assemble Model
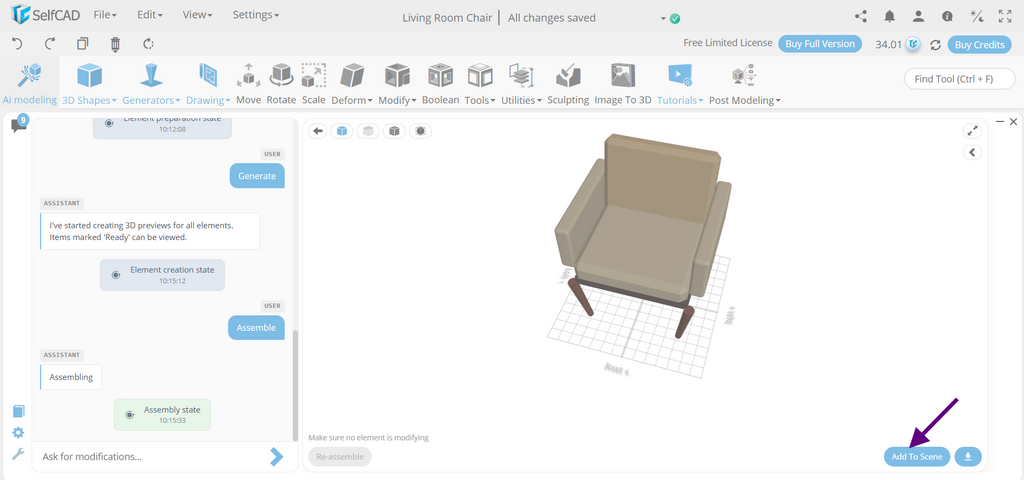
Now, the elements are ready click on Assemble Model:

The produced components are assembled during the assembly phase to create a final living room chair.
The seat and supporting structure should form a strong foundation, and the backrest should be securely attached to the back of the seat. If the design incorporates armrests, legs, or other reinforcing components, they must be properly placed to ensure stability and structural integrity. Examine the constructed chair from several angles to ensure proper alignment, connections, dimensions, and positioning of each component before proceeding to further modifications.
Before proceeding to the regular SelfCAD workspace, this review identifies potential difficulties with positioning, proportions, stability, alignment, strength, and component connections. Examining the designed chair from various angles also helps to validate that all elements work well and that the model is ready for further development and preparation for 3D printing.

Step 10: Add the Living Room Chair to the Scene
When you are satisfied with the created output, insert the living room chair into the SelfCAD scene. You can then continue to refine the AI-generated model using the standard modeling tools in the SelfCAD workspace.
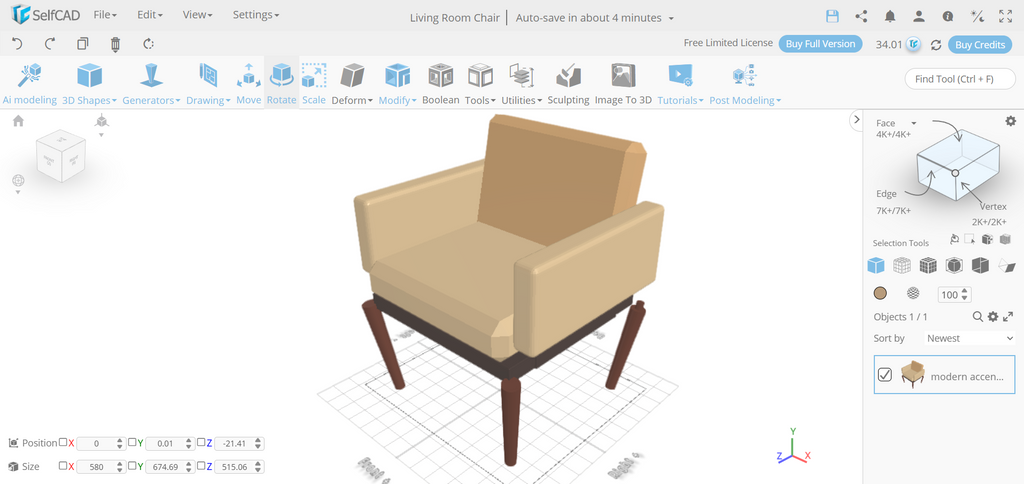
This change is significant because the design process does not have to conclude with AI modeling. While AI can generate the basic geometry, SelfCAD's traditional modeling tools offer more control over the final design. To alter the chair's dimensions, position, orientation, shape, and other design aspects, utilize tools like scale, Move, Rotate, and Stitch & Scoop.
The Final model looks like this:
Conclusion
A living room chair made with SelfCAD AI Modeling showcases how AI may help ease the early phases of 3D design. Instead of physically building the seat, backrest, legs, armrests, and supporting components, you may describe the design, including a reference photograph if necessary, and let AI create an initial model.
The primary benefit is the opportunity to refine and iterate on the design. If the initial result has improper proportions, an unstable base, an uncomfortable backrest, insufficient supports, or misaligned components, you can add more instructions to modify the model.
After creating the chair, you can use SelfCAD's typical 3D modeling tools to change its dimensions, shape, proportions, strength, edges, connections, and other aspects. This gives you complete control over the final design while employing AI to speed up the initial modeling phase.