
Create a Smartwatch Model: Step by Step Guide
SelfCAD's AI Assistant enables you to design 3D models by just entering your specifications into a text prompt. You can customize the smartwatch's size, body form, display, bezel, buttons, strap, sensors, and other design elements. AI can then produce an initial 3D model, eliminating the need to manually construct each component with different tools and basic shapes.
The AI Assistant includes many Model Creation Modes to accommodate various 3D modeling workflows. Depending on the method you choose, you may have different options for influencing how the smartwatch is created and structured.
Design a Smartwatch Model Using SelfCAD AI Features: Step by Step Guide
In this post, we will use SelfCAD's AI features to create a detailed and functioning 3D-printable smartwatch model. The procedure will also highlight an essential AI modeling principle: the more carefully you describe the smartwatch's design, dimensions, body shape, display, buttons, strap, sensors, and other elements, the closer the resulting 3D model will be to your original design.
Step 1: Open the 3D modeling workspace in SelfCAD.
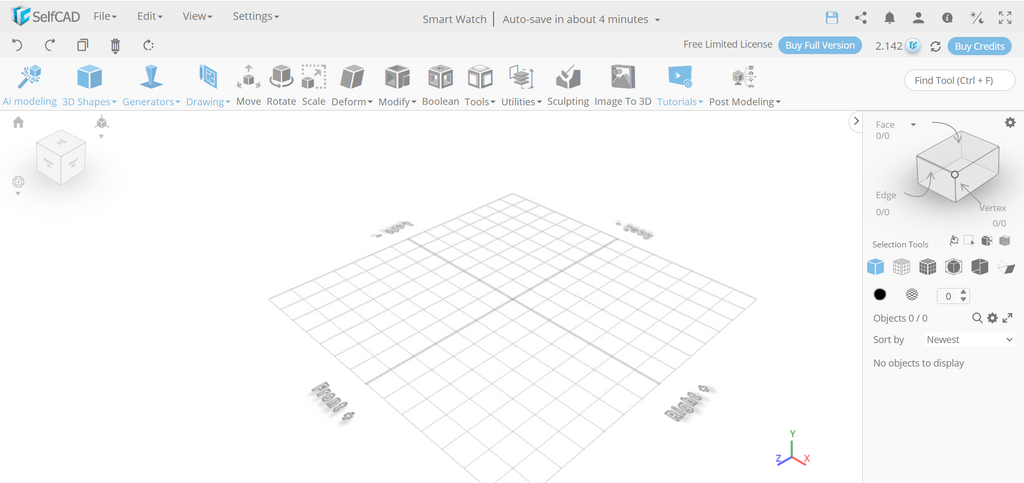
Step 2: Select the AI Modeling option from the toolbar
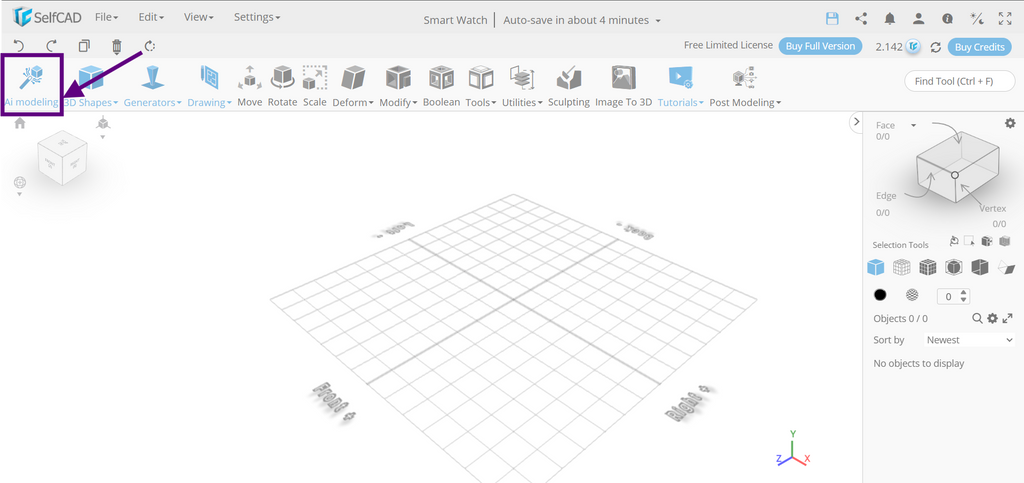
The AI Modeling interface allows you to specify your smartwatch design specifications using a text prompt. Depending on the type of product you want to build, SelfCAD offers various AI generating methods to help you create the desired model.
The goal is to design a well-organized smartwatch with distinct components including the main body, display, bezel, buttons, strap, sensors, and other vital functions. By supplying the AI with precise and detailed instructions, you can direct it to create a smartwatch that precisely meets your specs and is ready for further refining and 3D printing.
Step 3: Select the Mode of Model Creation
When you select the AI Modeling feature, the AI Assistant window will display. Here, you can select a suitable model production option, describe your smartwatch design in detail, and let the AI create the model.
The Model Creation Mode choice in the AI Assistant offers three options:
- Functional Assembly
- Organic Model
- Profile
Each mode is intended for a specific type of 3D modeling workflow. Choose the option that best corresponds to the structure and requirements of the smartwatch you want to develop.
Select Functional Assembly for the creation of smartwatch model:
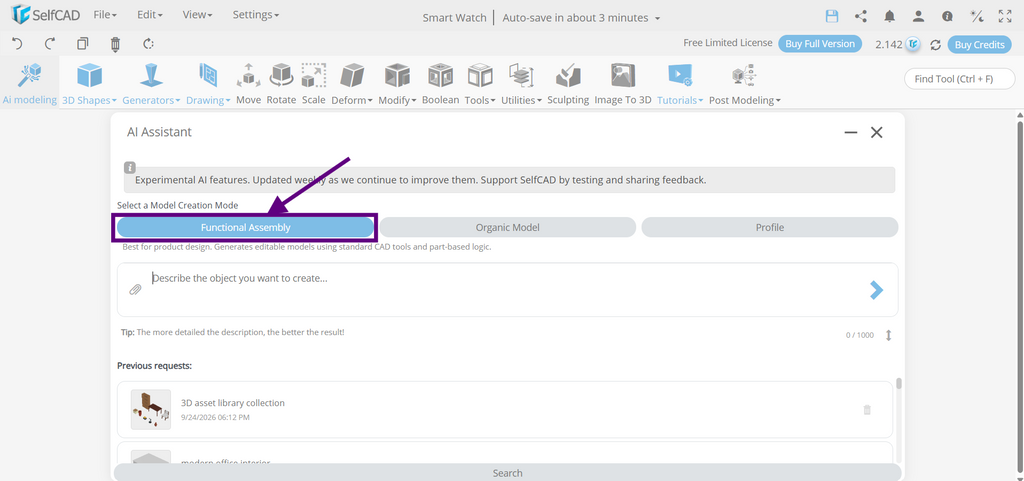
Functional Assembly is an appropriate Model Creation Mode for developing a smartwatch because it is designed for models that consist of several interconnected components. A smartwatch can be made up of individual components such as the main body, display, bezel, buttons, strap, sensors, and other structural parts that must fit together well.
Using Functional Assembly, you may build a structured, component-based wristwatch model in which individual pieces can be modified separately. This allows you to easily change the watch's overall dimensions, body shape, display size, strap design, button positioning, and other characteristics while keeping proper component relationships.
Step 4: Describe the Object you want to create
Give a full description of the smartwatch's overall shape, size, body construction, display, bezel, buttons, strap, sensors, and any additional design features you want to include.
You can also set the required level of detail, component sizes, proportions, orientation, and 3D printing specifications. A thorough and comprehensive description assists the AI in creating a more accurate and well-organized smartwatch model that closely reflects your design concept and serves as a solid foundation for future refinement and 3D printing.
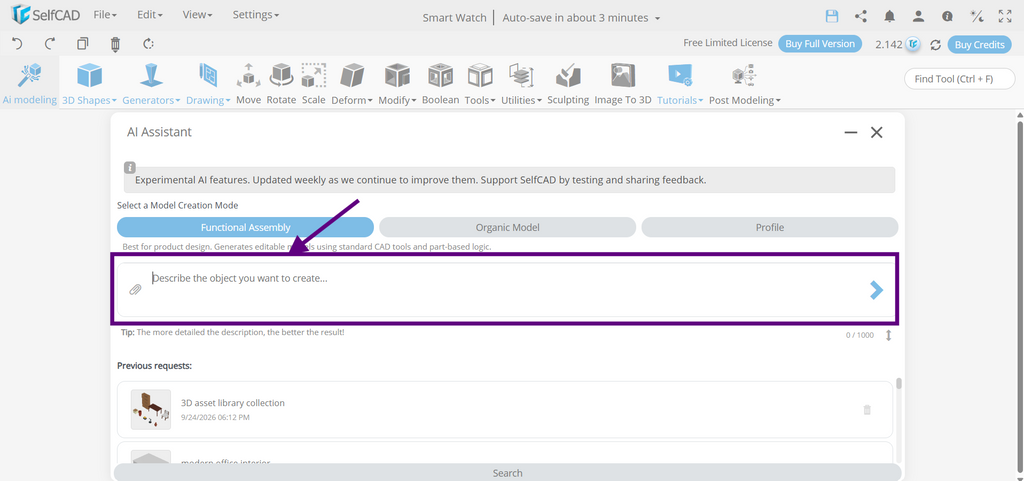
Step 5: Write a Prompt for Creating a Smartwatch Model
Now, give SelfCAD a full description of the smartwatch you wish to develop. A complete prompt is quite useful because it informs the AI about the smartwatch's style, size, shape, body construction, display, bezel, buttons, strap, sensors, and general appearance. The more exact your description, the more correctly the AI can produce a model that corresponds to your desired design.
Use the following prompt as an example:
Create a modern smartwatch with a rectangular body featuring softly rounded corners, a slightly raised bezel, and a centered rectangular touchscreen. Add two small side buttons for controls and a comfortable adjustable watch strap connected to both sides of the case. Include realistic proportions, smooth edges, and a slim profile suitable for a wearable device. Make the strap flexible-looking with evenly spaced adjustment holes. Keep the design clean, ergonomic, and symmetrical, with separate components for the watch case, screen, buttons, and strap. The model should be suitable for further editing and 3D printing.
Prepare a reference image:
Including a reference image can assist the AI better comprehend the smartwatch you intend to construct. An image can provide further visual direction about the watch's shape, style, dimensions, layout, and general appearance, supplementing the information provided in your written request.
On the other hand, a reference image should be utilized as a supplement to, not in substitute of, the prompt. A clear language description remains essential for communicating specific design needs. Including an image is absolutely optional; the AI Assistant may construct the smartwatch model using only a well-written and comprehensive request.
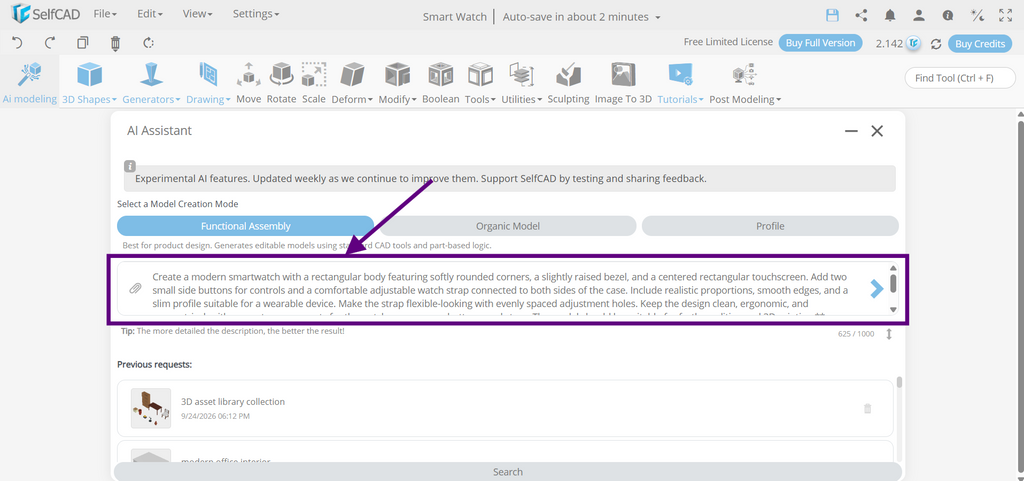
After typing the prompt, click the arrow below to create the element.
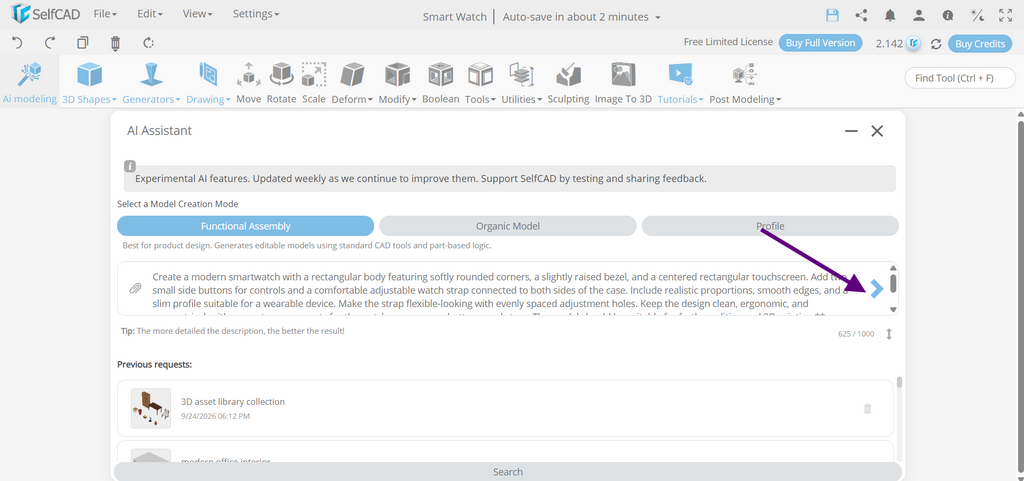
Step 6: Analyzing Request
The AI will evaluate your request based on the smartwatch's overall design, proportions, specific components, form, and structure. Based on this information, it will determine and produce the 3D elements needed to make the smartwatch in accordance with your specifications.
Step 7: Prepare Parts
The AI will evaluate your request, identify the required elements, and prepare each component individually before assembling the entire 3D smartwatch model.
When you click Prepare Parts, the AI will assess the request and prepare the necessary elements.
This shows the difference between AI-assisted and traditional 3D modeling. Instead of painstakingly developing fundamental primitives and determining how to build each component from the start, you describe the smartwatch you want to make. The AI then analyzes your specifications and determines the geometry and components required for the model.
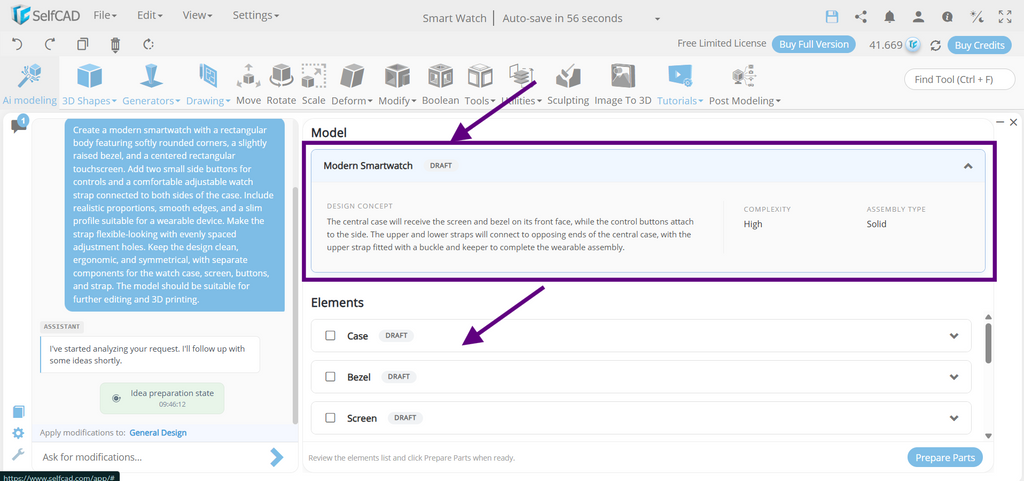
Here, you can see now the AI will prepare the elements.
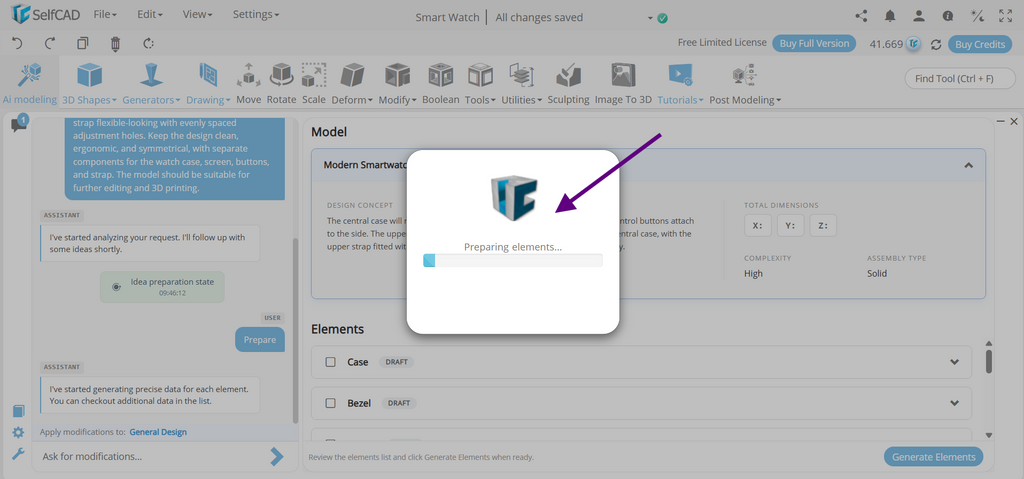
Ask For Modification:
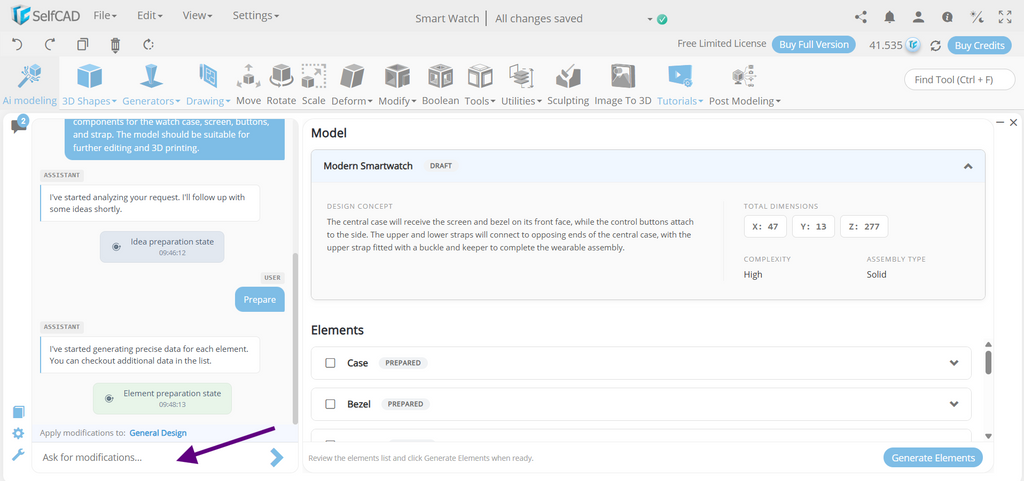
After you've prepared all of the necessary elements, you can use AI to refine the smartwatch even further. If a component has to be scaled, altered, relocated, or otherwise customized, supply the AI with detailed instructions outlining the changes. The AI will make the desired changes to the selected component, providing you more flexibility and control over the smartwatch's final design, as shown in the image above.
Step 8: Generate Elements
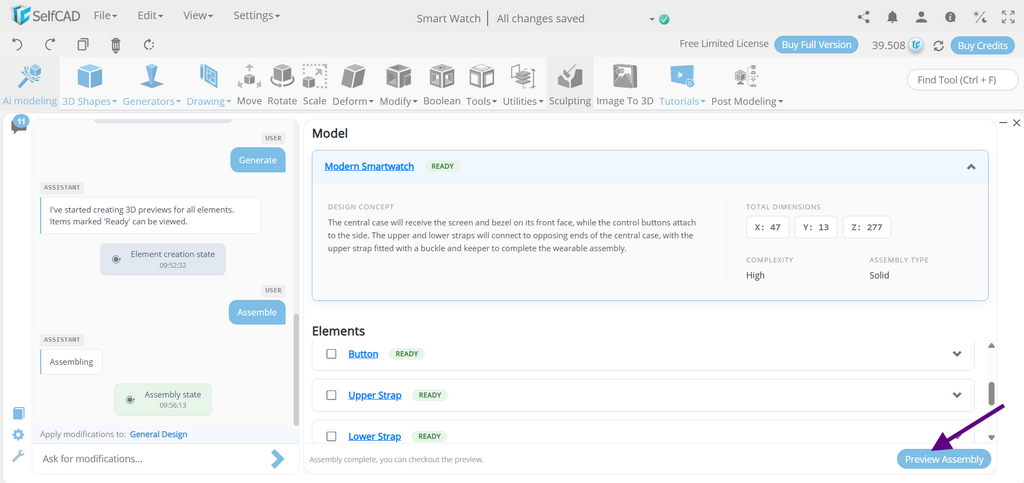
The system displays a design overview with information on the design concept, overall dimensions, complexity, and type of assembly before the geometry is generated. Individual components of the smartwatch include the main body, display, bezel, strap, buttons, camera or sensor features, and other design elements. You can choose which components to include in the model.
After evaluating the proposed components, use the checkboxes next to each piece to select the sections you want to generate. After you've made your selections, click Generate Elements in the Assistant box to build the 3D components you have chosen.
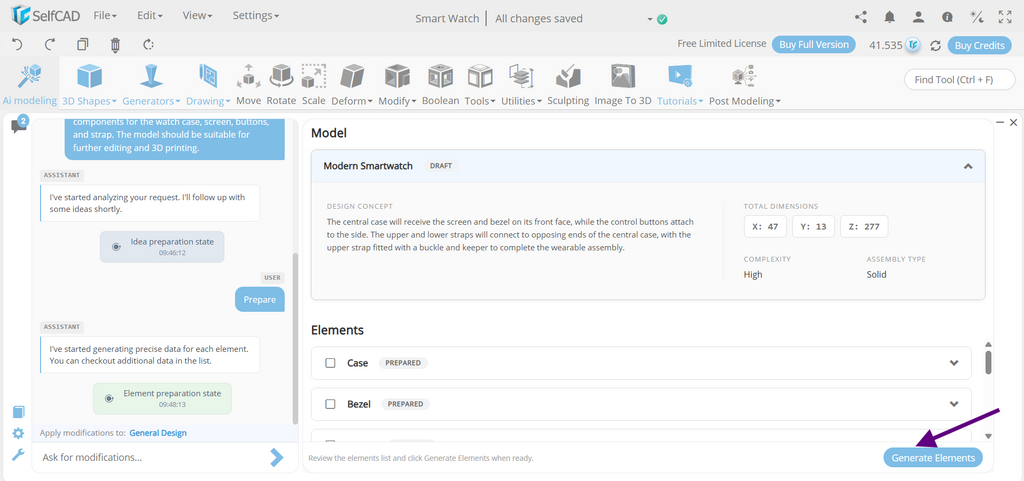
During this process, the interface is modified to display the generation status of each element.
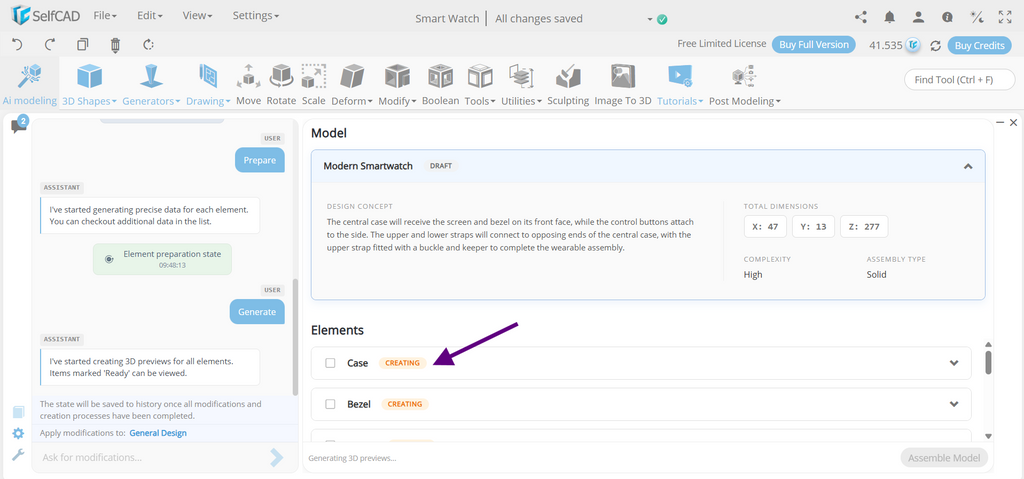
As each element completes processing, its state shifts from Creating to Ready.
Step 9: Assemble Model
Once all of the elements are ready, click Assemble Model.
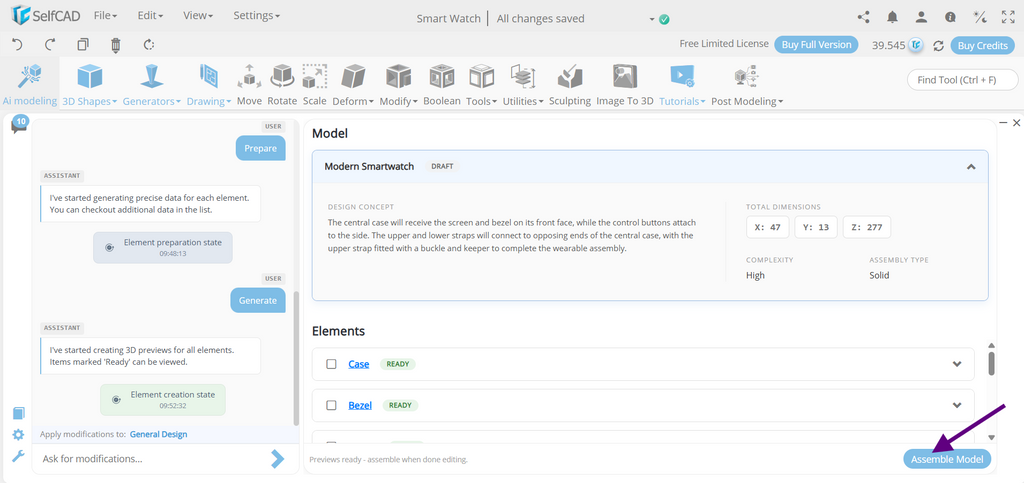
Once you click Assemble Model, the model is ready. Next, choose Preview Assembly to view your model.
Step 10: Add to Scene the model
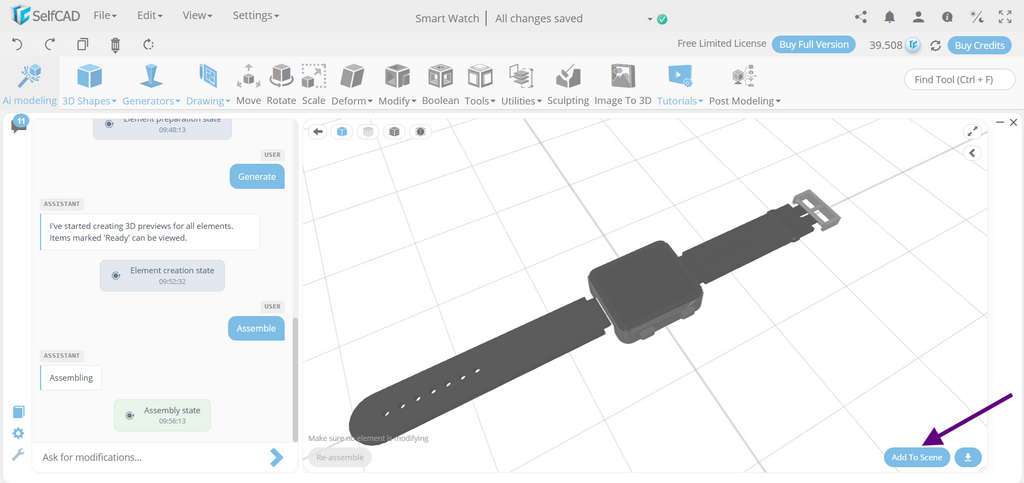
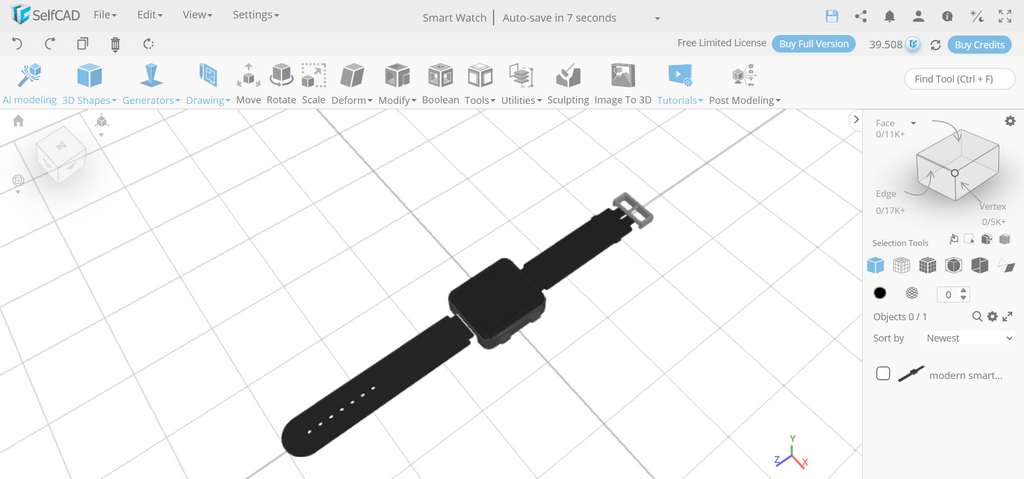
If you feel happy with the produced smartwatch model, you may incorporate it into the SelfCAD scene. The AI-generated smartwatch will then be integrated into your standard SelfCAD workspace, allowing you to further edit, polish, and improve the design using the available modeling tools.
This is a critical phase in the workflow because AI Modeling generates the initial smartwatch geometry, whereas SelfCAD's traditional modeling tools enable more flexibility over the final output. To obtain the desired design, adjust the smartwatch's size, body form, display, bezel, buttons, strap, sensor details, and other components.
Final Model:
Conclusion
Using SelfCAD AI Modeling to create a 3D smartwatch model highlights how AI may help with early product design stages. Instead of manually creating the watch body, display, bezel, buttons, strap, sensors, and other components from basic forms, you may explain your idea, optionally include a reference image, and let AI construct an initial smartwatch model.
One of the primary benefits of this method is the opportunity to refine the design over several iterations. If the smartwatch's proportions, body dimensions, display size, strap design, button location, or other specifications do not meet your needs, you can supply additional instructions and alter the created model accordingly.
Once the smartwatch matches your expectations, place it in the SelfCAD scene and utilize the usual modeling tools to make final adjustments, refine individual components, and prepare the model for 3D printing.